Harley Davidson ignition coil problems often lead to engine misfires and starting issues. These problems can affect overall bike performance.
Harley Davidson motorcycles are known for their power and reliability. Ignition coil issues, however, can compromise this reputation. Ignition coils play a crucial role in the engine’s performance. They convert the battery’s low voltage to the high voltage needed to ignite the fuel.
Faulty ignition coils can cause misfires, hard starting, and poor fuel economy. Regular maintenance and timely replacement of faulty coils can prevent these problems. Ignition coil problems can be diagnosed using specialized tools. Addressing these issues promptly ensures your Harley Davidson runs smoothly and efficiently. Keep your ride in top shape by understanding and managing ignition coil problems.
Introduction To Harley Ignition Coil Issues
Harley Davidson motorcycles are famous for their power and style. Yet, they can face ignition coil problems. Ignition coils are vital for engine performance. When they fail, your Harley might not run well. Understanding these issues can help you maintain your bike better.
Signs Of A Faulty Ignition Coil
A faulty ignition coil can show several signs. Some common symptoms are:
- Engine misfires
- Difficulty starting the motorcycle
- Poor fuel economy
- Check engine light turns on
- Loss of power
If you notice these signs, your Harley Davidson might need a new ignition coil.
Impact On Motorcycle Performance
A bad ignition coil affects your motorcycle’s performance. Here’s how:
| Issue | Impact |
|---|---|
| Engine Misfires | Reduces power and efficiency |
| Difficulty Starting | Makes the bike unreliable |
| Poor Fuel Economy | Increases fuel costs |
| Check Engine Light | Indicates potential damage |
| Loss of Power | Decreases riding enjoyment |
Addressing ignition coil issues promptly can keep your Harley in top shape. Regular maintenance can prevent these problems.
Credit: www.yumpu.com
Common Ignition Coil Problems
Harley Davidson motorcycles are known for their power and reliability. Yet, even the best machines can face issues. One common issue is ignition coil problems. Understanding these problems can help you maintain your bike better.
Wear And Tear Over Time
Ignition coils can wear out over time. This is due to constant use and exposure to heat. The heat and vibration can cause the coil’s insulation to break down. This leads to reduced performance.
Another sign of wear is cracks in the coil housing. These cracks allow moisture to enter, causing further damage. Regular inspections can help you catch these issues early.
Electrical Connection Failures
Loose connections can cause ignition coil problems. Vibration from riding can loosen the electrical connections. This can result in misfires or a failure to start.
Corrosion is another issue. Corroded connectors can disrupt the electrical flow. This leads to poor ignition performance. Cleaning the connectors regularly can help prevent this.
| Problem | Cause | Solution |
|---|---|---|
| Wear and Tear | Heat and Vibration | Inspect and Replace |
| Cracks in Coil | Physical Damage | Replace Coil |
| Loose Connections | Vibration | Tighten Connections |
| Corroded Connectors | Moisture | Clean Connectors |
- Inspect regularly to catch issues early.
- Clean connectors to prevent corrosion.
- Replace damaged coils to maintain performance.
Diagnosing The Ignition Coil
Experiencing ignition coil problems with your Harley Davidson can be frustrating. Diagnosing the issue early can save you time and money. This guide will help you understand how to diagnose your ignition coil.
Visual Inspection Tips
Start by visually inspecting the ignition coil. Look for any obvious signs of damage.
- Check for cracks on the ignition coil surface.
- Look for signs of corrosion or rust.
- Ensure all wires are securely connected.
- Inspect for any burn marks or discoloration.
A quick visual inspection can often reveal problems. If you notice anything unusual, the ignition coil might need replacement.
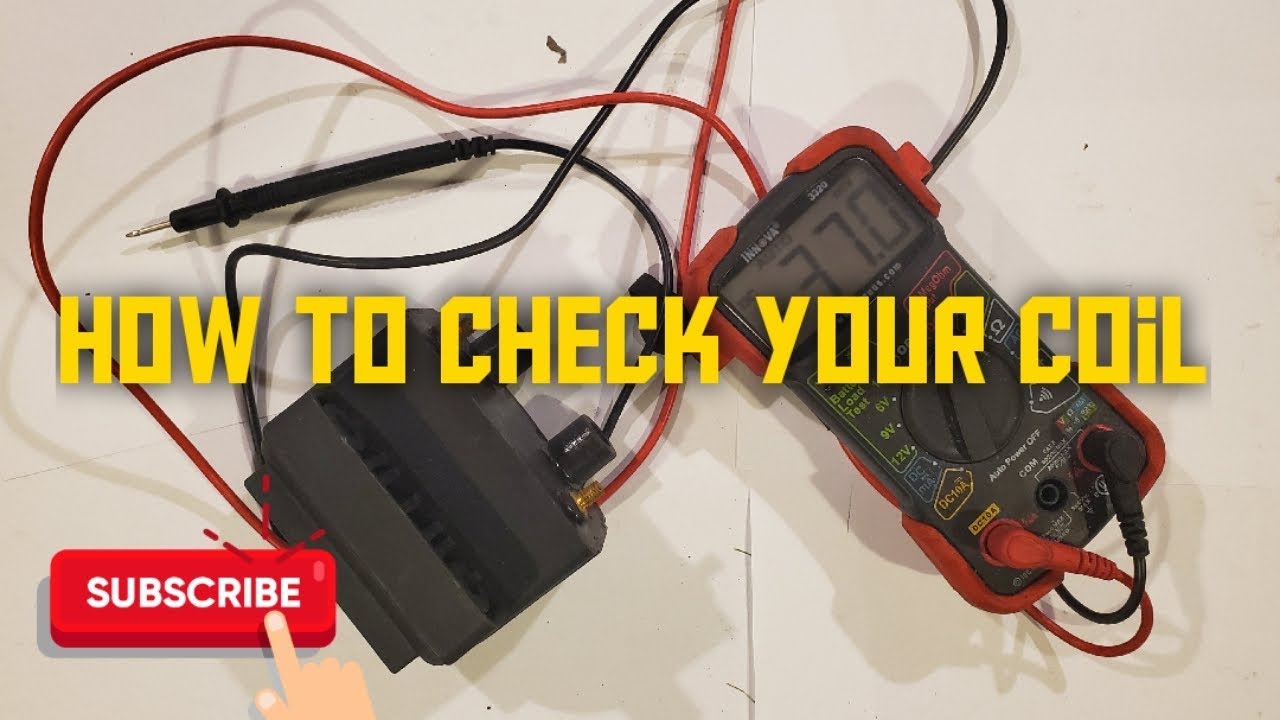
Using A Multimeter For Diagnosis
If the visual inspection doesn’t reveal issues, use a multimeter to test the ignition coil. Follow these steps to use a multimeter effectively:
- Set the multimeter to measure resistance (Ohms).
- Connect the multimeter leads to the ignition coil terminals.
- Check the primary resistance reading. It should match your bike’s specifications.
- Next, measure the secondary resistance. Refer to your Harley’s manual for the correct values.
If the readings are outside the specified range, the ignition coil is likely faulty. Replace the coil to ensure optimal performance.
By following these simple steps, you can diagnose ignition coil problems efficiently. Regular checks can help maintain your Harley Davidson in top condition.
Quick Fixes At Home
Harley Davidson ignition coil problems can interrupt your ride. Luckily, some quick fixes can be done at home. Below, we’ll discuss two simple methods: cleaning the coil contacts and securing loose connections.
Cleaning The Coil Contacts
Dirt and grime can affect your ignition coil. Cleaning the contacts can solve many issues. Follow these steps:
- Turn off your bike and let it cool.
- Locate the ignition coil. Check your manual for its location.
- Use a screwdriver to remove the coil cover.
- Inspect the coil contacts for dirt and corrosion.
- Use a soft brush to clean the contacts gently.
- For stubborn grime, use a contact cleaner spray.
- Let everything dry before reassembling.
Cleaning the contacts can improve your bike’s performance.
Securing Loose Connections
Loose connections can cause ignition coil problems. Securing them can be an easy fix. Here’s what to do:
- Turn off your bike and let it cool.
- Locate the ignition coil. Use your manual for guidance.
- Check all connections linked to the ignition coil.
- Ensure each connection is tight and secure.
- If you find a loose connection, tighten it using pliers.
- Inspect the wires for wear and tear.
- Replace any damaged wires to ensure a solid connection.
Securing connections ensures your ignition coil works correctly.
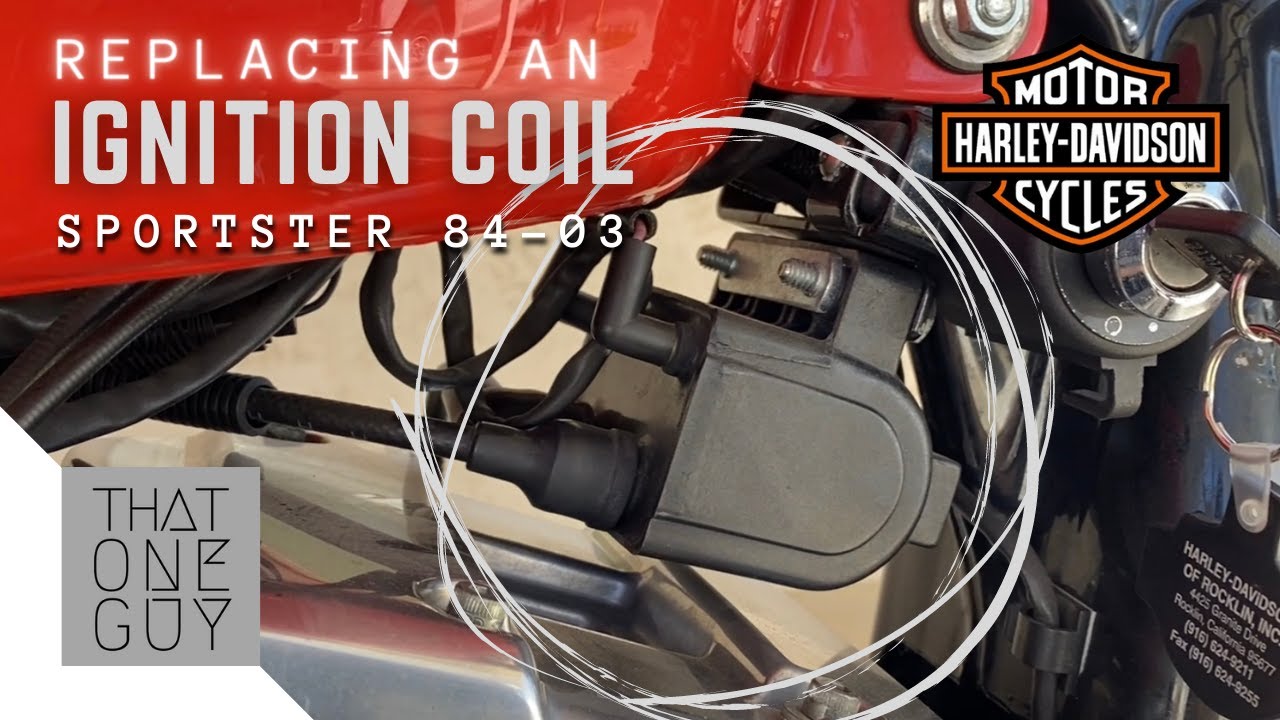
Replacing The Ignition Coil
Ignition coil problems can make your Harley Davidson difficult to start. Replacing the ignition coil can solve these issues. This guide will help you choose the right replacement and install it correctly.
Choosing The Right Replacement
Choosing the right ignition coil is crucial for your bike’s performance. Make sure to check your Harley Davidson’s model and year. Use a coil designed for your specific model.
- Check the manufacturer’s specifications.
- Read reviews from other Harley owners.
- Consider the brand’s reputation.
Look for coils with good heat resistance. They last longer and perform better. Opt for a coil with a high voltage rating. This ensures strong spark and efficient combustion.
Step-by-step Installation Guide
Follow this step-by-step guide to replace your ignition coil:
- Turn off the bike and disconnect the battery.
- Locate the ignition coil near the engine.
- Remove the old coil using a wrench.
- Install the new coil in the same position.
- Reconnect the wires to the new coil.
- Tighten the bolts to secure the coil.
- Reconnect the battery and start the bike.
Always follow the manufacturer’s instructions. Use the correct tools to avoid damage. Double-check all connections before starting the bike.
Preventive Measures
Harley Davidson ignition coil problems can cause serious issues. Taking preventive measures helps avoid these problems and ensures a smooth ride. Below are some key steps to keep your ignition coil in top condition.
Regular Maintenance Schedule
Following a regular maintenance schedule is crucial. Regular checks help identify potential problems early. Check the ignition coil during every service. Inspect for signs of wear or damage.
- Check the coil for cracks or corrosion.
- Ensure all connections are tight and secure.
- Replace the coil if you notice any damage.
Use a multimeter to test the coil’s resistance. Compare the readings with the manufacturer’s specifications. Replace the coil if the readings are off.
Protecting The Coil From The Elements
Protecting the coil from harsh elements extends its life. Weather can damage the coil over time. Water and dirt can cause the coil to fail.
- Keep the coil area clean and dry.
- Use a cover when parking your bike outside.
- Avoid riding through deep water or muddy areas.
Consider using a coil cover. A cover provides extra protection from dust and moisture. It also helps in keeping the coil cool.
| Preventive Measure | Action |
|---|---|
| Regular Maintenance | Check for cracks, corrosion, and loose connections. |
| Use a Multimeter | Test coil resistance and compare with specifications. |
| Protect from Elements | Keep clean, use a cover, avoid deep water. |
| Use a Coil Cover | Provides extra protection from dust and moisture. |
Taking these preventive measures ensures your Harley Davidson runs smoothly. Regular maintenance and protection can prevent many ignition coil problems.
Understanding Error Codes
Diagnosing Harley Davidson ignition coil problems can be challenging. Understanding error codes can help you identify issues quickly. These codes provide insights into your bike’s health. Knowing how to interpret them can save time and money.
Interpreting The Diagnostic Codes
Error codes are like your bike’s way of talking to you. They tell you what’s wrong. Here’s a simple guide to help you understand these codes:
| Error Code | Meaning |
|---|---|
| P1351 | Ignition Coil Front Shorted |
| P1352 | Ignition Coil Front Open |
| P1354 | Ignition Coil Rear Shorted |
| P1355 | Ignition Coil Rear Open |
These codes can be read using an OBD-II scanner. Once you have the code, you can take appropriate action.
When To Seek Professional Help
Sometimes, understanding error codes isn’t enough. If the problem persists, it might be time to seek professional help. Here are some signs:
- Your bike won’t start.
- There are unusual sounds or vibrations.
- The error code returns even after fixes.
Professional mechanics have the tools and knowledge to fix complex issues. They can ensure your bike runs smoothly again.
Credit: www.youtube.com
Troubleshooting Myths Debunked
Harley Davidson riders often face ignition coil problems. Many myths surround troubleshooting these issues. This post aims to debunk those myths and provide clarity.
Common Misconceptions
Many riders believe replacing the ignition coil will fix all issues. This is not always true. Ignition coil problems can stem from other sources.
- Myth: Faulty spark plugs are the main cause.
- Reality: Spark plugs may not always be the issue.
Another common belief is that older bikes have more coil problems. This is not necessarily the case. Newer models can also face ignition coil issues.
| Misconception | Truth |
|---|---|
| Only old bikes have coil issues. | New bikes can also have coil problems. |
| Replacing coils always solves the issue. | Other factors might be involved. |
Truth Behind Ignition Coil Fixes
Understanding the real causes of ignition coil problems can save time. Regular maintenance is key to preventing these issues. Checking the coil and related components is crucial.
- Inspect the coil for visible damage.
- Check for loose or corroded connections.
- Test the coil with a multimeter.
It’s also important to use quality parts. Cheap replacements can lead to more problems. Always consult the Harley Davidson manual for the best guidance.
Another truth is the importance of professional help. Sometimes, a skilled mechanic is the best solution. They can identify issues that are not obvious.
Remember, not all ignition coil problems are the same. Each issue may require a different approach. By debunking these myths, riders can better care for their Harley Davidson bikes.
Professional Vs. Diy Repair
Harley Davidson ignition coil problems can disrupt your riding experience. Knowing whether to call a mechanic or attempt a DIY repair can save time and money. This section explores the pros and cons of each option.
When To Call A Mechanic
Sometimes, professional help is necessary. Here are some signs to watch for:
- Persistent misfires: If your bike keeps misfiring, a mechanic can diagnose the issue.
- Complex issues: Some problems require specialized tools and knowledge.
- Safety concerns: If you’re unsure, it’s safer to consult a professional.
Calling a mechanic ensures the job is done right. Mechanics have the tools and expertise to fix ignition coil problems efficiently.
Cost-benefit Analysis Of Diy
DIY repairs can save money but require time and effort. Consider the following factors:
| Aspect | DIY Repair | Professional Repair |
|---|---|---|
| Cost | Low, mainly parts cost | High, includes labor |
| Time | High, learning and fixing | Low, quick and efficient |
| Skill Level | Requires basic mechanical skills | No skill required |
| Tools | Basic tools needed | All tools provided by mechanic |
Weighing these factors can help you decide the best approach for your situation. DIY repairs are cost-effective but require effort and time. Professional repairs are quick but come with higher costs.
Final Thoughts
The ignition coil is critical for Harley Davidson motorcycles. It ensures your bike starts smoothly and runs efficiently. Ignition coil issues can cause significant problems. They can lead to poor performance, misfires, or even engine failure.
Ensuring Longevity Of Ignition Coils
Maintaining your ignition coils can save you from many hassles. Follow these tips to keep them in top condition:
- Regularly inspect the coils for any signs of wear or damage.
- Keep them clean and free from dirt and grime.
- Ensure proper connections to avoid electrical issues.
- Replace worn-out coils immediately to prevent further damage.
Using high-quality fuel and oil also helps. They reduce the strain on ignition coils. Regular tune-ups can prolong the life of your coils.
Key Takeaways For Harley Owners
Here are some key points to remember:
- Inspect coils regularly for any damage.
- Keep coils clean to ensure optimal performance.
- Ensure proper connections to avoid electrical issues.
- Replace damaged coils promptly.
Proper maintenance of ignition coils can save you time and money. Your Harley will run smoother and more efficiently.
Credit: www.harley-davidsonforums.com
Conclusion
Addressing Harley Davidson ignition coil problems ensures a smoother ride. Regular maintenance can prevent most issues. Always use quality parts for replacements. Stay informed and consult professionals when needed. By taking these steps, you can keep your Harley Davidson performing at its best for years to come.
Ride safe and enjoy the journey.