To change the air filter in a Honda Civic, locate the air filter housing, remove the cover, and replace the old filter with a new one. A clean air filter ensures proper airflow and helps maintain the engine’s performance.
In this guide, we will walk you through the steps to safely and easily change the air filter in your Honda Civic.
Why Change Your Honda Civic’s Air Filter?
The air filter in your Honda Civic plays a crucial role in ensuring the optimal performance of your vehicle. It filters the air that enters the engine, preventing dust, dirt, and debris from causing damage. A clean air filter promotes efficient combustion, better fuel efficiency, and improved engine longevity.
- Enhances engine performance by allowing a sufficient amount of clean air into the combustion chamber.
- Prevents contaminants from reaching sensitive engine components, reducing the risk of wear and tear.
- Improves fuel efficiency by ensuring the proper air-fuel mixture.
- Helps reduce emissions, promoting a cleaner environment.
- Extends the lifespan of your engine and reduces the need for costly repairs.
- Optimizes engine performance, providing smoother acceleration and increased power.
- Enhances fuel efficiency, saving you money at the pump.
- Reduces the risk of engine damage and extends the lifespan of other engine components.
- Improves air quality inside the vehicle, ensuring a more comfortable driving experience.
- Keeps the engine running smoothly, minimizing the chances of breakdowns and costly repairs.

Credit: www.caranddriver.com
Step 1: Gather The Necessary Tools And Materials
To change the air filter in your Honda Civic, you will need a few tools and materials. Here is a list of what you will need:
| Socket wrench |
| 10mm socket |
| Flat-head screwdriver |
| New air filter |
When it comes to air filters for the Honda Civic, there are a few different types available. The most common types include:
- Foam air filters
- Cotton gauze air filters
- Panel air filters
- Performance air filters
Each type of air filter has its own advantages and disadvantages, so it’s important to choose the one that best suits your needs and preferences.
Step 2: Locate And Access The Air Filter Housing
To locate and access the air filter housing in a Honda Civic, follow these steps:
1. Open the hood of your Honda Civic and secure it.
2. Locate the air filter housing, which is usually located near the engine on the driver’s side.
3. Remove any components that may be obstructing your view or access to the air filter housing. These components may include cables, hoses, or electrical connectors.
4. Carefully examine the area surrounding the air filter housing and identify any other components that may need to be temporarily removed or repositioned to gain better access.
5. Once you have identified and removed any obstructing components, you should now have a clear view and access to the air filter housing. Take a moment to familiarize yourself with its shape and placement.
6. With your hands, gently lift the cover or lid of the air filter housing to expose the air filter inside.
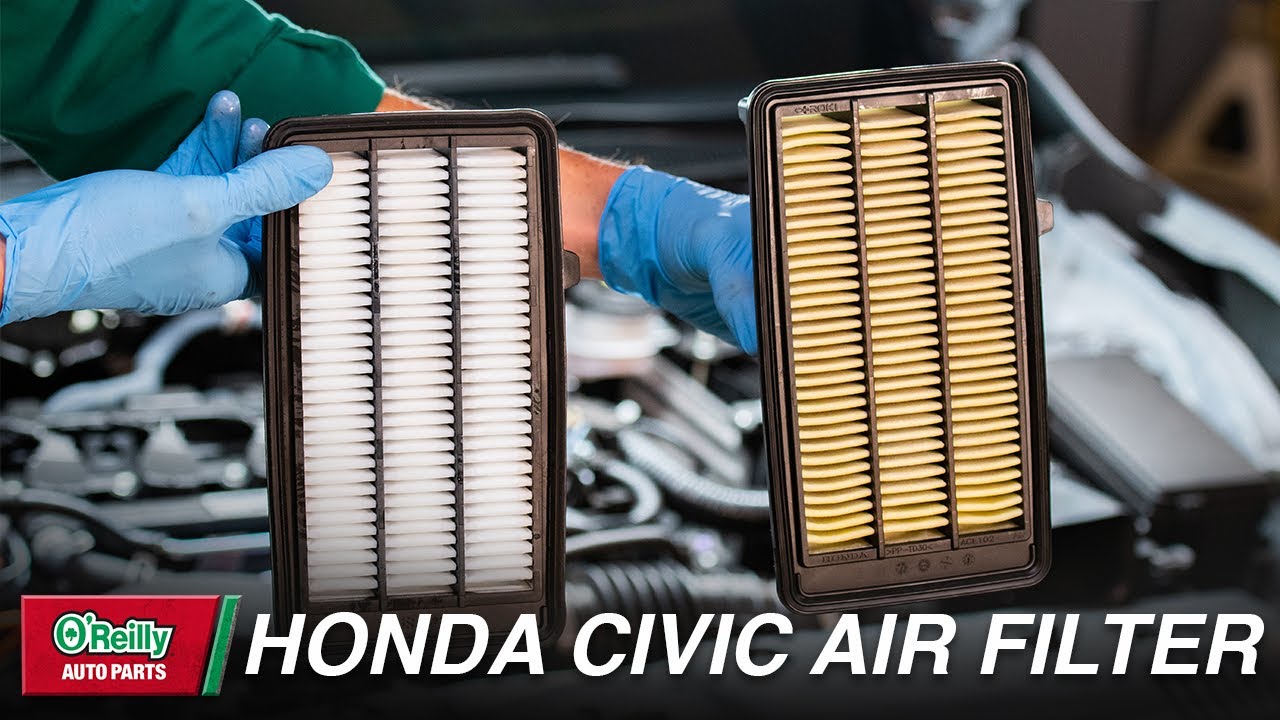
Step 3: Remove The Old Air Filter
Removing the old air filter from your Honda Civic can seem like a simple task, but there are a few challenges you may encounter along the way.
First, make sure you have the correct tools on hand, such as a screwdriver or pliers, to safely remove any fasteners holding the air filter in place.
Next, carefully locate the air filter housing. It is usually located at the top of the engine, enclosed in a black plastic box.
Once you have located the housing, remove any clips or screws that are securing it. Take extra care not to damage any surrounding components.
With the housing open, you can now remove the old air filter. Take note of the filter’s orientation, as you will need to install the new filter in the same way.
Dispose of the old filter properly, and then clean any debris or dirt from the housing before installing the new filter.
Ensure the new filter is positioned correctly, and then secure the housing back in place by reattaching any clips or screws.
Remember to inspect and change your air filter regularly to keep your Honda Civic running smoothly and efficiently.
Step 4: Inspect And Clean The Air Filter Housing
Inspecting and cleaning the air filter housing is an important step in changing the air filter of your Honda Civic. It ensures that the housing is free from any debris or dirt that may have accumulated over time. To clean the housing, you will need a few materials and follow some simple techniques.
- Rag or towel: Use a clean rag or towel to wipe the surface of the housing.
- Clean water: It is best to use clean water to ensure that there are no contaminants.
- Mild detergent: If the housing is particularly dirty, you can use a mild detergent to help break down the grime.
Next, follow these steps to clean the air filter housing:
- Open the air filter housing cover.
- Inspect the housing for any dirt or debris.
- Using a rag or towel, wipe the housing to remove any loose particles.
- If necessary, mix a small amount of mild detergent with water.
- Dip the rag or towel into the soapy water and gently wipe the inside and outside of the housing.
- Rinse the housing with clean water to remove any soap residue.
- Allow the housing to air dry completely before reinstalling the air filter.
By following these simple steps and using the right materials, you can effectively clean the air filter housing of your Honda Civic, ensuring that it functions optimally.
Step 5: Install The New Air Filter
To install the new air filter in your Honda Civic, it is important to ensure a secure fit. Start by removing the old air filter from its housing. Before installing the new filter, inspect the housing for any debris or dirt and clean it if necessary. Position the new air filter correctly by aligning the arrows on the filter with the arrows on the housing. This will ensure that the filter is facing the right direction and will function effectively. Once the filter is properly positioned, carefully lower it into the housing and ensure that it sits securely in place. Finally, close the housing and make sure it is sealed tightly. By following these steps and checking for a secure fit, you can be confident that your new air filter is installed correctly and will help maintain optimal air quality for your Honda Civic.
Step 6: Reassemble The Air Filter Housing And Test
To reassemble the air filter housing of your Honda Civic after changing the air filter, follow these steps:
- Place the clean air filter back into the housing, ensuring it fits snugly.
- Align the housing cover with the housing base and carefully press them together.
- Secure the housing cover and base using the clips or screws provided.
- Double-check that all connections are tight and secure.
- Before closing the hood, perform a quick test to ensure proper installation:
Start the engine and let it idle for a few minutes. Listen for any unusual noises or vibrations. Check that the engine is running smoothly and the air filter housing is securely in place. If everything seems fine, you can close the hood and breathe easy, knowing your Honda Civic is equipped with a fresh air filter.
Step 7: Dispose Of The Old Air Filter
Proper disposal of the old air filter is essential to ensure environmental sustainability. When changing the air filter in your Honda Civic, it is important to dispose of the old filter responsibly. This will help minimize environmental impact and comply with local regulations.
One of the most effective ways to dispose of an old air filter is to take it to a local recycling center or a facility that accepts used automotive filters. These centers are equipped to handle and process used filters appropriately, minimizing their environmental impact.
Alternatively, you can check with your local waste management authorities to find out about any specific disposal guidelines or recycling programs for automotive filters in your area. They may have specific drop-off locations or instructions for proper disposal.
Remember, improper disposal of automotive filters can lead to harmful pollutants entering our environment. By following proper disposal methods, we can protect our planet and contribute to a cleaner and healthier future.
Step 8: Maintenance And Frequency Of Air Filter Changes
Taking good care of your Honda Civic’s air filter is essential to ensure optimal performance and longevity. To maintain the air filter in optimal condition, follow these tips:
- Regular inspection: Check the air filter every month or every 12,000 miles, whichever comes first. Look for any signs of dirt, dust, or damage.
- Cleaning: If the air filter is still in good condition and not heavily clogged, you can clean it yourself. Use compressed air to blow out the debris or gently tap it against a hard surface to remove loose particles.
- Replacement: If the air filter is dirty, damaged, or can’t be cleaned, it’s time to replace it. The recommended frequency for air filter changes is typically every 12,000 to 15,000 miles or every 12 months.
- OEM filters: It’s recommended to use genuine OEM air filters to ensure the best fit and performance for your Honda Civic.
By following these maintenance tips and changing your air filter at the recommended frequency, you can keep your Honda Civic’s engine running smoothly and improve fuel efficiency.
Troubleshooting Common Air Filter Issues
The air filter in your Honda Civic plays a crucial role in ensuring the engine operates efficiently. However, it’s not uncommon to encounter issues after replacing the air filter. Here are some problems you may face and their solutions:
- Decreased Fuel Efficiency: If you notice a drop in your car’s fuel efficiency, it could indicate a problem with the air filter. Check if the filter is properly installed and clean or replace it as necessary.
- Engine Misfires: A dirty air filter can cause the engine to misfire or hesitate. Remove the filter and inspect it for dirt and debris. Clean or replace it to resolve the issue.
- Reduced Power: A clogged or faulty air filter can impair engine performance and result in reduced power. Inspect the filter and clean or replace it if needed.
- Odd Noises: If you hear unusual noises, such as whistling or hissing sounds, it could indicate an air leak caused by an improperly installed air filter. Check the filter and ensure it is correctly seated and tightly sealed.
Regularly inspecting and maintaining your Honda Civic’s air filter is essential for optimal performance and longevity of your vehicle. By addressing these common air filter issues promptly, you can ensure your car continues to run smoothly.
Conclusion
Changing the air filter in your Honda Civic is a simple yet essential maintenance task that can greatly benefit your car’s overall performance. By following the easy steps outlined in this guide, you can ensure that your engine receives clean air, which in turn improves fuel efficiency and reduces emissions.
With regular air filter changes, you can keep your Honda Civic running smoothly and prolong its lifespan. Don’t underestimate the importance of this routine maintenance task – your car will thank you!