
To change front rotors on a Ford F150 4X4, follow these steps. First, remove the wheels and caliper, then detach the old rotors and install the new ones.
Essential Tools
To change the front rotors on a Ford F150 4X4, you will need a few essential tools. First, you will need a wrench to remove the lug nuts on the wheels. A socket set will also be necessary to remove the caliper bolts and mounting bracket bolts. To clean the rotors and brake components, you will need brake cleaner and a wire brush to remove any rust or debris. Additionally, jack stands and a floor jack are essential for safely lifting and supporting the vehicle during the rotor replacement. Make sure to follow proper safety precautions and consult a Ford F150 repair manual for detailed instructions specific to your vehicle model.
Optional Tools
| Optional tools |
|---|
| Brake pad spreader |
| Torque wrench |
| Rubber gloves |
To change the front rotors on your Ford F150 4X4, you may find it helpful to have a few optional tools. A brake pad spreader can assist in compressing the brake pads to make installation easier. This tool helps ensure proper alignment of the brake pads with the rotors.
Additionally, a torque wrench is essential for tightening the bolts to the correct torque specification. This ensures that the rotors are securely fastened to the vehicle and helps prevent any potential issues down the road.
Lastly, it’s always a good idea to wear rubber gloves when working on your vehicle. This helps protect your hands from any dirt, grease, or brake fluid that may be present during the rotor replacement process.
1. Gather All Necessary Tools And Supplies
Gather all necessary tools and supplies for changing the front rotors on your Ford F150 4X4. Before you begin, ensure that you have the correct size of wrench and socket. Having the right tools will make the process much easier and efficient. It is important to check if all the required tools are available so that you can complete the task without any interruptions. By being prepared and having all the necessary tools on hand, you can save time and ensure a successful rotor replacement. Take a moment to gather everything you need before you start working on your Ford F150 4X4 front rotors.
2. Prepare The Vehicle
Parking the vehicle on a level surface is crucial before starting the process of changing front rotors on a Ford F150 4X4. This ensures stability and safety during the task. In addition, engaging the parking brake immobilizes the vehicle and prevents any unwanted movement during the procedure. Loosening the lug nuts of the front wheels before lifting the vehicle is also essential. This facilitates easier removal of the wheels later in the process.
| Step | Instructions |
|---|---|
| Step 2.1 | Park the vehicle on a level surface |
| Step 2.2 | Engage the parking brake |
| Step 2.3 | Loosen the lug nuts of the front wheels |
1. Elevate The Front Of The Vehicle
To change the front rotors on a Ford F150 4X4, you will need to elevate the front of the vehicle. To do this safely, use a floor jack to lift the front end of the vehicle off the ground. Once the vehicle is elevated, place jack stands under the frame for support. This will ensure that the vehicle is stable and secure while you work on the rotors.
2. Remove The Front Wheels
To change the front rotors on your Ford F150 4X4, you need to start by removing the front wheels. Completely remove the lug nuts and take off the front wheels. Make sure to secure the vehicle on jack stands before proceeding further.
Once the front wheels are removed, you will have access to the rotors. Inspect the rotors for any wear or damage, and if necessary, replace them. It is also a good idea to clean the brake caliper, rotor, and surrounding area to remove any dirt or debris that may interfere with the installation of the new rotors.
With the old rotors removed and the area cleaned, place the new rotors onto the hub assembly and secure them with the lug nuts. Torque the lug nuts to the manufacturer’s specifications using a torque wrench. Once the new rotors are properly installed, put the front wheels back on and tighten the lug nuts before lowering the vehicle off the jack stands.
Changing the front rotors on your Ford F150 4X4 is a relatively straightforward process, but if you are unsure about any step, consult the vehicle’s manual or seek professional assistance.
3. Remove The Caliper Assembly
To change the front rotors on a Ford F150 4X4, follow these steps. First, locate the caliper bolts. Then, use a wrench or socket set to loosen and remove the bolts. Finally, carefully remove the caliper assembly. This will allow you to access the front rotors and replace them with new ones. Remember to handle the caliper assembly with care to prevent any damage. Properly securing the caliper bolts is essential to ensure the brakes function correctly. By following these steps, you can easily change the front rotors on your Ford F150 4X4 and maintain the safety and performance of your vehicle.
4. Inspect Brake Pads And Hardware
Inspect the brake pads and hardware for any signs of damage or wear. It is important to regularly check the condition of the brake pads to ensure they are not worn down or damaged, as this could affect the performance of your Ford F150 4X4’s braking system. To inspect the brake pads, visually examine them to see if they have become thin or worn out. If the brake pads are less than a quarter inch thick, they should be replaced. Additionally, look for any signs of cracking or uneven wear. In addition to the brake pads, thoroughly inspect the brake hardware for any signs of damage. This includes checking the brake calipers, rotors, and brake lines for any leaks, corrosion, or excessive wear. Replace any damaged or worn out parts as necessary to maintain the integrity of your vehicle’s braking system. Regular inspection of the brake pads and hardware is crucial for ensuring optimal braking performance and safety on the road. By keeping your Ford F150 4X4 in top condition, you can enjoy a smooth and reliable driving experience.
5. Remove The Brake Rotor
To change the front rotors on a Ford F150 4X4, you’ll need to remove the brake rotor. This is an essential step in the process and can be done with the right tools and proper technique.
| How to Change Front Rotors on Ford F150 4X4 | |
|---|---|
| 5. Remove the brake rotor | |
| Use a wrench or socket set to remove the caliper bracket bolts | Take off the caliper bracket |
| Gently tap the old rotor with a rubber mallet to loosen it | Remove the old rotor from the hub |
1. Prep New Rotors And Brake Hardware
In order to change the front rotors on your Ford F150 4X4, you need to first prepare the new rotors and brake hardware. Start by cleaning the new rotors with brake cleaner to remove any protective coating. This will ensure optimal performance of the rotors once installed. Next, inspect the new rotor for any damage or defects. It is important to ensure that the rotor is in perfect condition before installation. If any issues are identified, it is recommended to replace the rotor. Additionally, if necessary, install any new brake hardware that may have come with the new rotors. This will ensure proper functioning of the brakes and help prolong the life of the rotors. By following these steps, you can successfully change the front rotors on your Ford F150 4X4.
2. Install New Rotor Onto The Hub
If you are looking to change the front rotors on your Ford F150 4X4, follow these steps to install the new rotor onto the hub:
- Carefully place the new rotor onto the hub, ensuring it is aligned properly.
By aligning the new rotor correctly, you ensure optimal performance and safety while driving. Be sure to tighten any bolts or screws according to the manufacturer’s specifications. Once the new rotor is securely in place, you can proceed with any additional steps required, such as installing new brake pads or reassembling other components. Regularly inspect and maintain these parts to ensure your Ford F150 4X4 functions properly and avoids any potential brake issues in the future.
3. Reinstall The Caliper Assembly
When changing the front rotors on your Ford F150 4X4, one of the next steps is to reinstall the caliper assembly. This involves reattaching the caliper bracket and applying any recommended thread locker to the caliper bolts. Once the caliper bracket is securely in place, tighten the caliper bolts using a wrench or socket set. This will help ensure that the caliper assembly is properly attached and will function correctly.
4. Install The Wheels And Lower The Vehicle
Put the front wheels back on the hub and tighten the lug nuts by hand. This is an important step to ensure that the wheels are securely attached to the vehicle. Once the lug nuts are tightened, you can lower the vehicle using the floor jack. Take it slow and make sure that the vehicle is stable before fully lowering it to the ground. This will prevent any accidents or damage to the vehicle. Once the vehicle is lowered, double-check that all the lug nuts are tightened properly. This will ensure that the wheels are secure and won’t come loose while driving. Now you’re ready to hit the road with your freshly changed front rotors on your Ford F150 4X4!
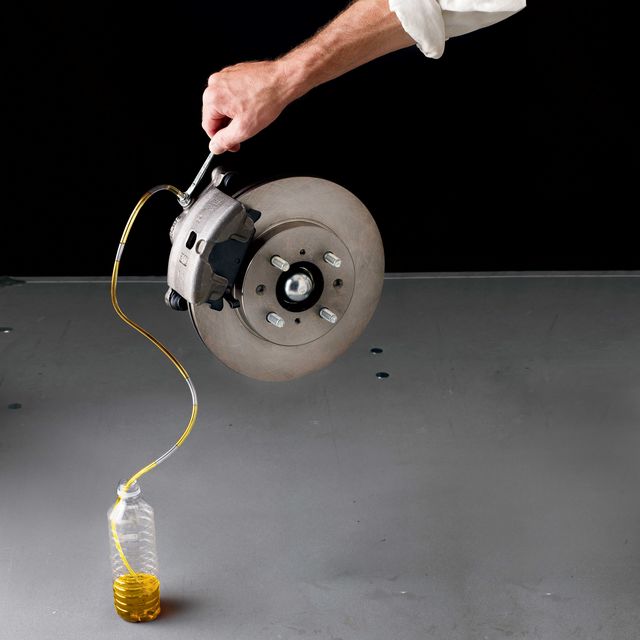
Credit: www.popularmechanics.com
5. Torque The Lug Nuts
When changing the front rotors on your Ford F150 4X4, it is important to torque the lug nuts properly. Using a torque wrench, tighten the lug nuts to the manufacturer’s specifications. It is recommended to follow the torque pattern for your specific vehicle model. This ensures that the lug nuts are tightened uniformly and prevents uneven distribution of pressure on the rotors. By torquing the lug nuts correctly, you can ensure that the wheel is securely fastened to the rotor and prevent any potential issues while driving. Remember to always refer to the manufacturer’s guidelines for torque specifications to ensure a safe and proper installation.
1. Pump The Brake Pedal
Pump the brake pedal several times to restore brake pressure. This step is necessary before changing the front rotors on a Ford F150 4X4. By starting the engine and pumping the brake pedal, you will ensure that the brake system is pressurized and ready for the rotor replacement. This will also help in preventing any accidents or mishaps during the procedure. Make sure to press the pedal firmly and repeatedly to build up the required pressure. Once you have completed this step, you can move on to the next step in changing the front rotors on your Ford F150 4X4.
2. Check Brake Fluid Level
Inspecting the brake fluid level in the master cylinder reservoir is an important step when changing front rotors on a Ford F150 4X4. The brake fluid level should be checked regularly to ensure proper brake function. To inspect the brake fluid level, locate the master cylinder reservoir, which is usually near the firewall on the driver’s side of the engine compartment. Remove the cap and visually inspect the fluid level. It should be between the minimum and maximum marks on the reservoir. If the fluid level is below the minimum mark, add brake fluid until it reaches the proper level. It is essential to use the correct type of brake fluid specified in the vehicle’s owner’s manual. Regularly checking and maintaining the brake fluid level will help ensure optimal brake performance and safety while driving.
3. Test The Brakes
Testing the brakes is an important step when changing the front rotors on a Ford F150 4X4. After replacing the rotors, it’s crucial to ensure proper functionality of the brakes before driving. Find a safe and open area to perform the test. Slowly drive the vehicle and apply the brakes gently. Pay close attention to the response and performance of the brakes. If they feel spongy or unresponsive, there may be an issue that needs to be addressed. Testing the brakes after changing the front rotors will give you peace of mind and ensure the safety of you and your passengers.
4. Repeat The Process For The Other Front Rotor
To change the front rotors on a Ford F150 4X4, simply repeat the process for the other front rotor. Ensure careful execution of the steps to maintain the integrity of the vehicle’s braking system.
Changing the front rotors on a Ford F150 4X4 is a straightforward process that can be done at home with a few basic tools. Start by jacking up the front of the vehicle and secure it on jack stands. Remove the wheels to gain access to the front rotors. Next, locate the caliper mounting bolts and remove them using a socket wrench. Carefully remove the caliper, making sure not to damage the brake line. Hang the caliper out of the way using a bungee cord or wire. With the caliper out of the way, you can now remove the old rotor by simply pulling it off the hub. Clean the hub surface with a wire brush to remove any rust or debris. Place the new rotor onto the hub, making sure it is properly aligned. Reinstall the caliper, tightening the mounting bolts securely. Repeat the process for the other front rotor, following the same steps. Finally, put the wheels back on, lower the vehicle, and test the brakes to ensure they are working correctly.
5. Clean And Organize
To clean and organize after changing the front rotors on your Ford F150 4X4, make sure to tidy up the work area and properly store all the used tools. Removing any tools or debris from the workspace will help maintain a clean and organized environment, making it easier to work on future projects. Additionally, storing the tools properly will ensure they are kept in good condition and easily accessible for future use. By following these steps, you can maintain a neat and orderly work area, promoting efficiency and safety in your automotive repairs.
Additional Tips For Front Rotors Change On Ford F150 4×4
To change the front rotors on your Ford F150 4X4, it’s important to take some additional tips into consideration for a successful process. First and foremost, wear safety glasses and gloves to protect yourself from any potential harm. These protective gears will ensure your safety throughout the entire process.
Additionally, make sure to consult the vehicle’s manual for any specific instructions or torque specifications. This will help you understand the manufacturer’s guidelines and ensure that you have the correct tools and equipment necessary for the job.
In conclusion, following these additional tips will greatly assist you in changing the front rotors on your Ford F150 4X4. By wearing safety glasses and gloves, and consulting the vehicle’s manual, you’ll be able to complete the task efficiently and safely.
Conclusion
To sum up, changing the front rotors on your Ford F150 4X4 is a manageable task that can improve the performance and safety of your vehicle. By following the step-by-step instructions provided in this guide, you can confidently take on this DIY project.
Remember to gather the necessary tools, exercise caution, and take your time for a successful rotor replacement. Enjoy a smoother and more efficient ride with your newly installed front rotors.